
Overview
ELMYRION is a High Five with its own client for people who like to build a strong party. You run the party and the command channel from the interface. Leave a character on offline trade or craft, come back to the hunt and meet opponents with your own lineup. There is no vitality, no recommendation bonus and no common gear.
We are recreating monster and boss behavior from the original PTS scripts. Every foe has its own character — learn its habits and gain the upper hand in battle.
- Character start
- Level 1 and 1,500 adena
- Per account
- up to 7 characters
- Windows
- according to zone rules
- Bots
- allowed
- Offline
- trade and craft
- Common gear
- none
- Vitality
- off
- Mid Battle
- up to 9 clients per computer
Currencies
Adena pays for trade, crafting and game services. Coin of Luck buys Premium, personal runes, crafting cubes and cosmetics. Ancient Adena, Olympiad Tokens and other High Five currencies are also in use.
- Adena
- chronicle currency
- Coin of Luck
- Premium, runes, cubes and cosmetics
Rates
- EXP
- x3 → x1
- Adena
- x1
- Mob drop
- x1 amount
- Spoil
- x3 chance, x1 amount
- Raid bosses
- x3 chance, x1 amount
- Epics
- x1 chance and amount
- Quest EXP and SP
- x1, with exceptions
The first levels go faster, then the EXP pace gradually comes back toward classic High Five. Normal monsters provide adena and items. Spoil shows up more often, but not in stacks. Raid bosses also have a higher drop chance. Epic bosses keep the usual chances and reward amounts. The exact rates are listed below.
Selling to NPC shops
When you sell an item to a merchant, the NPC pays you Adena. The percentages below apply to the amount an NPC normally pays a player under High Five rules. Purchase prices and sale payouts are shown separately in the examples.
- Regular items
- 50% (×0.5)
- Recipes
- 15% (×0.15)
Examples: selling regular items
Two examples, each for one scroll. Purchase prices are from the Alt+B consumables shop. “An NPC normally pays” means the payout before our sale-rate reductions.
Scroll of Escape
- You pay at the Alt+B shop
- 440 Adena
- An NPC normally pays you
- 200 Adena
- An NPC pays you on Elmyrion
- 100 Adena
Payout calculation: 200 × 0.5 = 100 Adena.
Scroll of Resurrection
- You pay at the Alt+B shop
- 2 200 Adena
- An NPC normally pays you
- 1 000 Adena
- An NPC pays you on Elmyrion
- 500 Adena
Payout calculation: 1 000 × 0.5 = 500 Adena.
Examples: selling recipes from Luxor
Each of these Luxor bundles contains 1 recipe and 13 crafting pieces. The purchase price is for the entire bundle. Both NPC payouts below are for 1 recipe only; you keep the 13 pieces. The normal payout is shown before our sale-rate reductions.
Recipe: Sealed Dark Crystal Breastplate
- You pay for the bundle at Luxor
- 991 590 Adena
- An NPC normally pays for 1 recipe
- 46 300 Adena
- An NPC on Elmyrion pays for 1 recipe
- 6 945 Adena
Payout calculation: 46 300 × 0.15 = 6 945 Adena.
Recipe: Sealed Tallum Plate Armor
- You pay for the bundle at Luxor
- 1 413 578 Adena
- An NPC normally pays for 1 recipe
- 67 700 Adena
- An NPC on Elmyrion pays for 1 recipe
- 10 155 Adena
Payout calculation: 67 700 × 0.15 = 10 155 Adena.
Party leveling and bonuses
- EXP and SP within a party follow the classic High Five retail distribution rules.
- Party-size bonuses and the standard level-difference penalties also follow the retail rules.
- A full party of 9 characters receives a +120% party bonus.
Command Channel leveling
Normal monsters award EXP and SP to parties that dealt damage; other parties receive no reward simply for being in the Command Channel. For Raid Bosses and Epic Bosses, eligible members across the Command Channel share EXP and SP under the High Five PTS rules, even if their party dealt no damage. Example: 1,000,000 base EXP, two parties of 9 equal-level characters, with no personal bonuses or penalties. Values are rounded to whole EXP and shown per character (Party A / Party B). The normal-monster example includes the full-party bonus; the party bonus is not applied to Raid/Epic Boss rewards.
Normal monsters
| Damage (Party A / B) | EXP per character (A / B) |
|---|---|
| 500k / 500k | 122,222 / 122,222 |
| 900k / 100k | 220,000 / 24,444 |
| 1,000k / 0 | 244,444 / 0 |
Raid and Epic Bosses
| Damage (Party A / B) | EXP per character (A / B) |
|---|---|
| 500k / 500k | 55,555 / 55,555 |
| 900k / 100k | 55,555 / 55,555 |
| 1,000k / 0 | 55,555 / 55,555 |
Quests
Quests keep the spirit of High Five alive: journeys, familiar stories and rewards worth adventuring for. Quest EXP and SP use x1 rates, with one early-game exception: Marcela’s starter quests give no EXP, while their armor and other rewards remain classic.
The quests listed below pay Adena once per character. The disclosure lists one-time quests and available item reward paths. Some hunting quests do not drop a quest item from every monster.
- Quest EXP and SP
- x1, with exceptions
- Marcela’s quests
- no EXP
- Quest adena
- restricted
Quests with abuse restrictions
Protection against repeated Adena farming. Below are one-time quests and item reward paths that remain available.
Quests that cannot be repeated 54
A cash reward closes these quests. Separate restrictions are noted in the list.
- The Guard is Busy One-time Adena reward.
- Orc Hunting One-time Adena reward.
- Collector's Dream One-time Adena reward.
- Trade with the Ivory Tower One-time Adena reward.
- Orc Subjugation One-time Adena reward.
- Bonds of Slavery One-time Adena reward.
- Traces of Evil One-time Adena reward.
- Invention Ambition One-time Adena reward.
- Wrath of Ancestors One-time Adena reward.
- Invaders of the Holy Land One-time Adena reward.
- Skirmish with the Werewolves One-time Adena reward.
- Dark Winged Spies One-time Adena reward.
- The Few, The Proud, The Brave One-time Adena reward.
- Muertos Feather One-time Adena reward.
- Fabulous Feathers One-time Adena reward.
- Handle With Care One-time reward; access to Yugor remains available.
- Threat Removal Separate one-time limit on the item reward.
- Brigands Sweep One-time Adena reward.
- Tarantula's Spider Silk One-time Adena reward.
- Crystals of Fire and Ice One-time Adena reward.
- Collect Spores One-time Adena reward.
- Destroy Plague Carriers One-time Adena reward.
- Catch the Wind One-time Adena reward.
- Bones Tell the Future One-time Adena reward.
- Sweetest Venom One-time Adena reward.
- Grim Collector One-time Adena reward.
- Sense for Business One-time Adena reward.
- Curiosity of a Dwarf One-time Adena reward.
- Arrow of Vengeance One-time Adena reward.
- Alligator Hunter One-time Adena reward.
- Hunting for Wild Beasts One-time Adena reward.
- Help Rood Raise A New Pet! One-time Adena reward.
- Dig Up the Sea of Spores! One-time reward: Adena or EXP/SP.
- Warehouse Keeper's Ambition One-time Adena reward.
- Illegitimate Child of the Goddess One-time Adena reward.
- Plunder Their Supplies One-time Adena reward.
- Devil's Legacy One-time Adena reward.
- Silver Haired Shaman One-time Adena reward.
- Trespassing into the Holy Ground One-time Adena reward.
- Collector of Jewels One-time Adena reward.
- An Elder Sows Seeds One-time Adena reward.
- Grave Robber Rescue One-time Adena reward.
- Lucien's Altar One-time Adena reward.
- The Finest Food One-time Adena reward.
- A Dark Twilight One-time Adena reward.
- A Looter and a Railroad Man One-time Adena reward.
- Runaway Youth One-time Adena reward.
- Wild Maiden One-time Adena reward.
- I'd Rather Be Collecting Fairy Breath One-time Adena reward.
- Making the Harvest Grounds Safe One-time Adena reward.
- Defeat the Elrokian Raiders! One-time Adena reward.
- Guardian of the Skies One-time Adena reward.
- Cursed Life One-time Adena reward.
- Proof of Existence One-time Adena reward.
Item rewards and exchanges remain available 27
Adena is not paid again. Every new reward requires the quest items and stages again. Once Adena has been paid, random rewards use the item outcomes.
- Request from the Farm Owner Repeat: potions, arrows and shots for skins.
- Keen Claws Repeat: random equipment or a potion.
- The Food Chain Repeat: equipment for 25 teeth.
- Head for the Hills! Repeat: 5 Scrolls of Escape for 50 claws.
- Covert Business The ring can be earned again if it is absent from your inventory.
- Dreaming of the Skies The ring can be earned again if it is absent from your inventory.
- Scent of Death Repeat: a healing potion.
- Vanquish Remnants After the cash payout, keep collecting badges for Black Lion Hunt access.
- Recover the Farmland Relic collecting and restoration remain available.
- Adept of Taste Repeat: recipes; at least two special ingredients are required.
- Under the Shadow of the Ivory Tower Repeat: exchange ectoplasm for crystals and potions.
- 1000 years, the End of Lamentation Repeat: an errand for 1000 relics, with crystals and potions.
- Method to Raise the Dead Repeat: bills for resource exchanges.
- Go Get the Calculator Repeat: the calculator.
- Conquest of Alligator Island Repeat: map collection and treasure hunting.
- Family Honor Ancient statue appraisal remains available.
- Bard's Mandolin Repeat: only the Theme of Journey score, without the 10,000 Adena.
- Shrieks of Ghosts Porcelain collecting and appraisal remain available.
- Grand Feast Repeat: jewelry for a complete feast delivery.
- Watching Eyes Repeat: materials.
- Shadow of Light Repeat: materials.
- Heart in Search of Power Repeat: materials.
- Necromancer's Request Repeat: collect zombie brains and exchange them for materials.
- In the Forgotten Village Repeat: collect undead livers and exchange them with Mina.
- Seekers of the Holy Grail Repeat: S-grade enchant scrolls for 2000 totems.
- An Aged Ex-Adventurer Repeat: a D-grade armor enchant; each rescue costs 100 C-grade soulshots.
- Aiding the Floran Village Repeat: D-grade enchant scrolls for hunting trophies.
These limits apply only to the listed quests. Beginner bonuses remain one-time; normal level and class requirements still apply.
7 Raid Bosses — Legendary Tales
Defeat the seven servants of Antharas in Dragon Valley and choose an Icarus weapon as your reward.
- Start at level 80 with Watcher of Antharas Gilmore in Dragon Valley. Accept his quest before hunting.
- Gather Large Dragon Bones and offer them at a Dragon Vortex to summon the raid bosses.
- Defeat each of the seven: Emerald Horn, Dust Rider, Bleeding Fly, Blackdagger Wing, Shadow Summoner, Spike Slasher and Muscle Bomber.
- Return to Gilmore with all seven skulls. Choose one regular Icarus weapon from 11 options.
- For a crossbow, choose Icarus Spitter and convert it with the Kamael skill.
- This quest can be completed once per character. After receiving the weapon, you cannot repeat it.
Enchant
The first enchant steps are safe: normally to +3, and to +4 on full-body armor. After that every scroll is a risk: on failure the item breaks. Weapons go to +16, armor and jewelry to +10. Cloaks and headgear are not enchanted. The chances below are for normal scrolls.
- Safe
- +3
- Full body
- +4
- Weapon
- up to +16
- Armor
- up to +10
- Jewelry
- up to +10
Weapon, normal scroll
- +3→+4
- 65%
- +4→+5
- 50%
- +5→+6
- 45%
- +6→+7
- 40%
- +7→+8
- 35%
- +8→+9
- 30%
- +9→+10
- 25%
- +10→+11
- 20%
- +11→+12
- 15%
- +12→+13
- 12%
- +13→+14
- 10%
- +14→+15
- 10%
- +15→+16
- 10%
Magic weapon, normal scroll
- +3→+4
- 55%
- +4→+5
- 48%
- +5→+6
- 43%
- +6→+7
- 38%
- +7→+8
- 32%
- +8→+9
- 25%
- +9→+10
- 22%
- +10→+11
- 18%
- +11→+12
- 12%
- +12→+13
- 10%
- +13→+14
- 10%
- +14→+15
- 10%
- +15→+16
- 10%
Armor and jewelry, normal scroll
- +3→+4
- 70%
- +4→+5
- 50%
- +5→+6
- 40%
- +6→+7
- 37%
- +7→+8
- 35%
- +8→+9
- 25%
- +9→+10
- 15%
Full body, normal scroll
- +4→+5
- 50%
- +5→+6
- 40%
- +6→+7
- 37%
- +7→+8
- 35%
- +8→+9
- 25%
- +9→+10
- 15%
Attribute enhancement
Success chance when adding an attribute to weapons and armor.
- Attribute stones
- 40%
- Attribute crystals
- 30%
Attribute Masters
Attribute Masters sell stones of all six elements for 50,000,000 Adena each. Exchange 20 stones plus 5,000,000 Adena for one crystal of the same element. Opposite-element stones can be exchanged 1:1.
Classes
Begin your journey in Elmyrion ready for the hunt. Every new character receives NG starter armor, shots and weapon coupons. Your first class transfer through Alt+B unlocks your new class and provides basic D-grade equipment. Open the packs below to see what is included.
Your first class transfer grants 15 D-grade shadow weapon coupons; your second grants another 15 for C-grade weapons. Double-click a coupon in your inventory to choose a weapon that suits your playstyle. Class transfers are available for adena.
Transfer requirements
- First
- 50,000 adena
- Second
- 150,000 adena
- Third
- 10,000,000 adena
- Noblesse
- full quest
Starting rewards
Your first adventure · NG
- Class-appropriate no-grade starter armor: upper body, lower body and helmet.
- 9,000 beginner NG Soulshots and 3,000 beginner NG Spiritshots — every character receives both.
- 250 healing potions for your first battles.
- 5 coupons to choose your starter shadow weapons.
After your first class transfer · D-grade
- Claim this pack once when completing your main class’s first transfer through Alt+B.
- Basic D-grade armor for your chosen class: heavy, light or robes. Shield-using classes also receive a shield.
- Fighters receive 6,000 D-grade Soulshots; mages receive 2,000 D-grade Blessed Spiritshots.
- Orc Shamans receive light armor, 6,000 D-grade Soulshots and 4,000 regular D-grade Spiritshots.
- Shadow jewelry: two earrings, two rings and a necklace.
- 15 coupons to choose D-grade shadow weapons.
Bonus Start · from 14 November
- Available once per account to a character created after Bonus Start was enabled on 14 November 2026.
- The EXP +50% rune activates as soon as you receive it.
- Open the C-grade box at level 40 and the B-grade box at level 52. Choose a suitable weapon and heavy, light or robe armor. Each set includes jewelry.
- The rune, boxes and equipment share a 7-day lifetime from the moment the bonus is received. Opening a box does not extend it.
Subclass
The subclass quest is shortened: collect the quest items from the three raid-boss chests in the Tower of Insolence and bring them to Reorin. Subclasses start at level 40 and can reach level 85. Each character can have up to three subclasses.
Quick guide: three chests for your subclass
- At level 75 or above, take Fate’s Whisper from Maestro Reorin. For a party, the leader accepts it for members at level 75 or above. Do this before the raid bosses are killed.
- In the Tower of Insolence, find Death Lord Hallate, Kernon and Longhorn Golkonda. After each boss dies, open the chest that appears through its quest dialogue and collect the scepter. The chests disappear quickly, so do not delay.
- Once you have all three scepters, return to Reorin to receive the Star of Destiny. This completes the shortened quest.
Becoming a Noblesse
The path to Noblesse follows the classic Possessor of a Precious Soul quest chain on your subclass.
Barakiel or 100 fragments
At the Barakiel stage, choose one of two paths: defeat the boss to obtain the quest staff, or collect 100 fragments from monsters. Bring the staff or fragments to Ossian and continue your journey to Noblesse.
Learning skills
Regular skills are learned automatically. Forgotten Skills and Divine Inspiration, which increases buff slots, must be learned manually using the corresponding books.
Olympiad
Olympiad details will be announced separately.
Events and battles
A strong party proves itself in battle. Test your skills in the arena, enter TvT with your party or rally your allies to storm a castle. Each event offers a different challenge, from personal duels to coordinated assaults.
Castle sieges and Territory Wars
Castle sieges and Territory Wars alternate by week, with each event held every two weeks. All nine territories fight in the same Territory War. Gather your allies and choose a battle for your lineup. Times below are in Kyiv time. Gludio follows its own Brasil Battle schedule.
- Daytime sieges
- 16:00
- Evening sieges
- 21:00
- Territory Wars (TW)
- 19:00
- Territory flags per castle
- up to 3 at a time
Gladiator · 1v1 and 9v9
Visit the Gladiator in Giran to arrange a duel or a clash between two full parties. Choose your format, stake adena and face your opponent. Duels test your own skills; 9v9 battles test the teamwork of your entire party.
TvT · win together
Your leader registers the whole party, so you fight on the same side. On a battlefield with three bridges, hold the crossings, cover your allies and choose when to change your attack. Fallen fighters return to the action, keeping the battle alive until the match ends.
Castle Siege event · attack and defend
A separate team event in Gludio Castle: attackers break through the gates to reach the Castle Heart, while defenders hold the line and repel the assault. Capture the Heart and hold the castle: the side with the longest total control wins. The teams swap starting roles in the next round. Everyone has a part to play, from a well-timed push to a last-second rescue.
Mid Battle, Big Battle and Brasil Battle
- Mid Battle allows up to 9 characters per computer in the battle area.
- Big Battle lets you bring your lineup with no client limit.
- Regular areas have no client limit. Sieges, Territory Wars and open-world epics follow the format of their battle area.
- Brasil Battle is the Gludio siege on Saturdays at 20:00 Rio de Janeiro time, every two weeks. Mid and Big formats alternate.
- Check the map for siege and Territory War dates, times and formats. Open-world epic battle formats are shown in Alt+B.
World
Catacombs and necropolises are always open — hunt whenever your party is ready. In selected hunting grounds, monsters return faster as the area sees more action, keeping your hunt moving.
Your gear builds your reputation. Raise your Gear Score and overtake rivals in the server-wide and class rankings. Build a set worth showing off and make your name known across the server.
New adventurers can join a clan academy. Hellbound is open at level 11. The Blacksmith of Mammon visits Giran in the evening; the Merchant of Mammon sells the Dualsword Craft Stamp. An MP sphere in Giran’s trading area helps you recover mana.
- Catacombs and necropolises
- always open
- Gear Score ranking
- Claim your place among the best
- Academy
- yes
- Hellbound
- open · level 11
- Mammon
- Giran, 19:00–21:00
- MP sphere
- Giran trade zone
Morale in Dragon Valley
Morale is a party buff that helps you fight in Dragon Valley. It has three levels: the higher the level, the more bonuses your party receives.
Its level depends on your party composition. A full party of nine players does not automatically guarantee level III — a suitable lineup can reach it with fewer members.
How to obtain the buff
- Form a party and travel to Dragon Valley.
- Stay close to the party member attacking monsters.
- Attack monsters that grant Morale, such as Drakos or Bone Scorpions.
The buff is applied to living members of your party in Dragon Valley within 1600 units of the attacker. Simply being in the area is not enough — an attack is required.
Other parties do not affect your Morale, even when attacking the same monster.
Main bonuses at each level
| Bonus | Morale I | Morale II | Morale III |
|---|---|---|---|
| Physical critical rate | +10% | +30% | +50% |
| Physical critical damage | +10% | +15% | +20% |
| Physical and magical attack | — | +15% | +15% |
| Attack and casting speed | — | — | +15% |
| EXP gained | — | — | +20% |
| Duration | 60 seconds | 60 seconds | 60 seconds |
The critical-rate percentages increase the stat; they are not a guaranteed probability of landing a critical hit.
How to reach level I, II or III
Each character contributes points based on their active class. The points of all party members are added together.
| Party points | Result |
|---|---|
| 33 or fewer | No buff |
| 34–54 | Morale I |
| 55–82 | Morale II |
| 83 or more | Morale III |
The table below gives the final point contribution per character — no extra calculations are needed. If several party members share a class, each character contributes their points separately.
Class points and the eight groups
| Class group | Class — points |
|---|---|
| 1. Tanks | Phoenix Knight — 15 Hell Knight — 17 Eva’s Templar — 29 Shillien Templar — 25 |
| 2. Summoners and necromancer | Arcana Lord — 37 Elemental Master — 35 Spectral Master — 39 Soultaker — 15 |
| 3. Mages | Archmage — 4 Mystic Muse — 3 Storm Screamer — 3 |
| 4. Archers and crossbow user | Sagittarius — 3 Moonlight Sentinel — 3 Ghost Sentinel — 3 Trickster — 8 |
| 5. Dagger users | Adventurer — 3 Wind Rider — 5 Ghost Hunter — 11 |
| 6. Healers and overlord | Cardinal — 1 Eva’s Saint — 1 Shillien Saint — 1 Dominator — 5 |
| 7. Buffers and bards | Hierophant — 0 Sword Muse — 0 Spectral Dancer — 0 Doomcryer — 0 |
| 8. Other fighters | Duelist — 5 Dreadnought — 17 Titan — 1 Grand Khavatari — 0 Fortune Seeker — 17 Maestro — 19 Doombringer — 3 Soulhound — 11 |
| Separate classes | Inspector — 23 Judicator — 23 |
There is another way to obtain Morale III: include at least one representative of each of the eight numbered groups in a single party. Level III is then granted regardless of the total points.
A contribution of 0 points does not make a class useless for Morale: a buffer or bard can fill a required group. Inspector and Judicator add points but do not represent any of the eight groups.
Example: improving Morale as your party grows
All examples use the classes listed above.
| Party composition | Points | Buff |
|---|---|---|
| Phoenix Knight + Soultaker + Archmage | 15 + 15 + 4 = 34 | Morale I |
| Same party + Arcana Lord | 34 + 37 = 71 | Morale II |
| Same party + Dreadnought | 71 + 17 = 88 | Morale III |
These are calculation examples, not required lineups: you can build your own combination.
Duration and reapplication
The buff lasts 60 seconds. If attacks continue, the same monster can check again after 55 seconds. Other monsters have their own checks. Without reapplication the effect expires, and leaving the Dragon Valley zone removes it.
If Morale does not appear, check your party composition, distance from the attacker and the monster you chose. Not every Dragon Valley monster grants this buff.
Shadai’s shop in Giran
Visit the legendary blacksmith for new skills and essences to enhance your Dynasty armor. Everything listed below is available for Adena.
Forgotten scrolls — 10 books
- Fighter's Will
- Archer's Will
- Magician's Will
- Protection of Rune
- Protection of Elemental
- Protection of Alignment
- Enlightenment - Wizard
- Enlightenment - Healer
- Final Secret
- Create Item Lv. 10 — a crafting scroll for Maestros level 82+.
Dynastic Essence I and II
For enhancing Dynasty armor.
- Dynastic Essence
- Dynastic Essence II
More skill books — 7 books
- Sixth Sense
- Expose Weak Point
- Servitor Barrier
- Silent Mind
- Seven Arrow
- Meteor
- Star Fall
Bosses
Normal raid bosses are worth hunting: the loot is richer, and the next spawn takes 30 to 45 hours. Use Alt+B to check the status of raid and epic bosses. Epic levels are listed below.
Instance bosses have a character of their own. Their skills, battle phases and behaviour are rebuilt from original PTS scripts. Read the fight, react to its mechanics and lead your party to victory.
- Queen Ant
- 40
- Core
- 80
- Orfen
- 80
- Zaken
- 83
- Baium
- 80
- Sailren
- 80
- Tiat
- 82
- Beleth
- 83
- Baylor
- 83
- Antharas
- 85
- Valakas
- 85
- Frintezza
- 85
- Freya
- 85
Random respawn: Baium and Orfen
The countdown starts when the boss is killed. There is no fixed spawn time: after the initial waiting period, the boss returns at a random moment within the next 12 hours.
- Baium
- 5 days + a random 0–12 hours
- Orfen
- 28 hours + a random 0–12 hours
The main Zaken raid is level 83. Its loot includes the regular Zaken Earring with a 5% drop chance. Parties at levels 76–82 can also enter Zaken Light, which has its own rewards.
Light raids · Zaken, Freya and Frintezza
Gather a party of nine and challenge familiar bosses. Light versions offer their own rewards for progressing groups as they prepare for bigger battles.
- Entry is for one full party of 9 characters at levels 76–82. The party leader starts the run at the respective raid NPC.
- Light shares a cooldown with the corresponding normal version, applied after victory. Choose the version that suits your group.
- Zaken resets on Monday, Wednesday and Friday at 06:30. Freya and Frintezza reset on Wednesday and Saturday at 06:30 server time.
Raid instances · entry and resets
Gather your group at the entrance; the leader takes everyone inside. Every member’s reuse timer must have expired. Reset times below use server time; the time limit starts when the instance is created. Zaken, Freya and Frintezza apply reuse after victory.
Zaken · 83
- Level
- 78+
- Group
- Party: 9; command channel: 9–27
- Time limit
- 60 minutes
- Re-entry
- Monday, Wednesday and Friday, 06:30
Freya · normal and hard
- Level
- 82+
- Group
- Party: 9; command channel: 9–27
- Time limit
- 120 minutes
- Re-entry
- Wednesday and Saturday, 06:30
Frintezza
- Level
- 80+
- Group
- Command channel: 9–45 players
- Time limit
- 120 minutes
- Re-entry
- Wednesday and Saturday, 06:30
The leader needs Frintezza’s Magic Force Field Removal Scroll to enter.
Tiat · Seed of Destruction
- Level
- 75–85
- Group
- Party: 9; command channel: 9–45
- Time limit
- 130 minutes
- Re-entry
- 5 days after victory
Crystal Caverns · Tears, Kechi, Darnel and Baylor
- Level
- 78+
- Group
- Party: 2–9 players
- Time limit
- 90 minutes
- Re-entry
- 24 hours after entry
Each player needs a Contaminated Crystal. Collect the three cavern boss crystals to reach Baylor.
Kamaloka and Labyrinths
Choose a room within 5 levels of your character. The Hall and Labyrinth have separate reuse timers, so you can complete both in one day. Reuse starts after the final boss dies and clears at the next 06:30 server time. A failed attempt before victory does not consume the day’s run.
Kamaloka · Hall of the Abyss
- Level
- 23, 26, 33, 36, 43, 46, 53, 56, 63, 66, 73
- Group
- Party: 2–6 players
- Time limit
- 30 minutes
- Re-entry
- Daily at 06:30
Kamaloka · Labyrinth of the Abyss
- Level
- 29, 39, 49, 59, 69, 78, 81, 83
- Group
- Party: 2–9 players
- Time limit
- 45 minutes
- Re-entry
- Daily at 06:30
Seed of Infinity · halls and Ekimus
Fight through the halls of the Seed of Infinity and prepare your group to face Ekimus. Attack and defence bring different challenges that reward teamwork. Available halls and modes depend on the current Seed of Infinity stage. Reuse resets daily at 06:30 server time. Hall of Erosion can also apply reuse when the mission fails.
Hall of Suffering · twins
- Level
- 75–85
- Group
- Party: 2–9 players
- Time limit
- 60 minutes
- Re-entry
- Daily at 06:30
Hall of Erosion
- Level
- 75–85
- Group
- Command channel: 5–27 players
- Time limit
- 40 minutes
- Re-entry
- Daily at 06:30
Heart of Immortality · Ekimus
- Level
- 75–85
- Group
- Command channel: 5–27 players
- Time limit
- 40 minutes
- Re-entry
- Daily at 06:30
Hellbound · Demon Prince and Ranku
Hellbound is open at level 11. Prepare the required entry items for each member before entering the Steel Citadel. The victory cooldown resets on Wednesday and Saturday at 06:30 server time.
Demon Prince
- Level
- 78+
- Group
- Party: 2–9 players
- Time limit
- 30 minutes
- Re-entry
- Wednesday and Saturday, 06:30
Each member needs a Seal Breaker for the 5th floor.
Ranku
- Level
- 78+
- Group
- Party: 2–9 players
- Time limit
- 30 minutes
- Re-entry
- Wednesday and Saturday, 06:30
Each member needs a Seal Breaker for the 10th floor.
Loot and party
Make auto-loot work the way you play. Collect items, adena and herbs automatically or keep picking them up by hand. When playing several characters, you can gather your own characters’ loot on the party leader and spend less time moving items around.
Invite friends along: Random and By Turn modes still include the other player and award their share. Leader collection applies to your own characters without taking your friend’s loot. Adjust it in .CFG whenever you need.
Spoil is enhanced in the Square and Tower of the Delusion Chamber — another reason to bring a dwarf and hunt for materials.
Auto Hunt
Built-in Auto Hunt lets you auto-farm 24/7 directly in the ELMYRION client. Choose your skills, set your hunting area and party support, then start from the compact circular panel. No separate program is needed.
The in-game panel
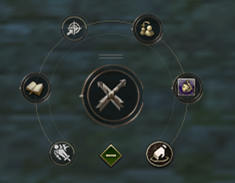
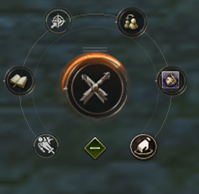
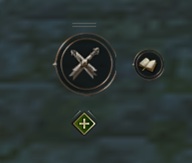
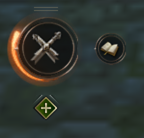
The orange glow shows that hunting is active. Collapse the panel to free up screen space.
Combat and skills
- Choose from three combat modes: skills with weapon attacks between them, weapon attacks only, or skills only. Pick what suits your character.
- Choose skills by their familiar in-game icons. Attacks, debuffs, Spoil, self buffs and healing each have their own tab.
- Set when to use a skill and how much MP to keep in reserve. Pick an available condition from the selected skill’s settings.
Targets and hunting area
- Switch between near and far target search, or keep hunting around a chosen spot. Adjust the search distance to suit your hunting area.
- Enable options to skip monsters already engaged by others, recover from obstacles and stop hunting when you move your character manually.
Party and companion
- Assist an ally on their target, follow the leader and turn off independent target searching when needed.
- For ally buffs, choose a recipient or your party, the support distance and when effects should be refreshed. There is no complex condition setup for each buff.
- Companion settings cover summoning, following the owner, attacking the selected target and choosing companion skills.
Potions and healing
- Set up automatic CP, HP and MP potions. These settings are shared with .CFG, so you do not need to configure them twice.
- Choose healing skills and the HP thresholds for healing yourself and your party. Healers also have a healing-only support mode.
Getting started and arranging the panel
- Open the settings with .hunt or from the circular panel. Choose your mode and skills, then start hunting with the central swords button or the Start button in the settings window.
- Drag the circle by its rim and the settings window by its header. The + / − button expands or collapses the panel, and your chosen position is saved.
- Hide the Auto Hunt panel in .CFG → Interface / ACP. This only hides the circle; hunting keeps running. Use the hunting stop button to stop it.
Automatic supply restocking
- Open .CFG → Supplies / cubes and choose the items and stock levels you want. Save up to five items in your list.
- Once enabled, the system buys missing supplies every two hours for adena at Alt+B shop prices. Purchases require adena and inventory space.
- You can enable leader payment for your own characters in the same party on the same computer. Keep your group supplied for longer hunts.
Interface
The ELMYRION client helps you stay in control of the fight: follow your opponent’s moves, find your next target and bring your regular party together. Arrange your panels to suit your playstyle, from familiar High Five to a compact modern look.
Alt+B opens the buffer, teleports, warehouse and game services. Explore the interface tools for hunting, the Olympiad and everyday play below.
Combat and targeting
- Lock onto your opponent and enable retargeting after a target break to keep track of them in the heat of battle.
- Watch your own casts and your target’s casts, display damage on screen and enable the low-HP warning.
- Next Target adapts to your goal: any target, monsters only or hostile players. Ctrl+T switches modes; set the search range in the interface options.
Olympiad at a glance
- A dedicated panel shows the match timer and damage dealt and taken, so you can read the duel at a glance.
- Distance to your opponent, movement speed and casting speed help you judge when to close in or keep your distance.
- Icons of skills used by your opponent and estimated effect timers help you read their moves and plan your response.
- Enable automatic recording of victories to save your winning matches and revisit the best moments.
Party and command channel
- Save your party roster and invite the same players again through Save/Load Party. Getting ready for the next hunt is easier.
- Customize the party panel and the buffs and debuffs it highlights to spot teammates who need help sooner.
- Auto-party and auto-trade make managing your own characters easier. Configure party and command-channel travel with the leader separately in .CFG.
Make the interface your own
- Three panel styles: Elmyrion, Essence and Classic HF. Choose the look you prefer for your character, target, party and pet.
- Adjust the rows and icon size of the compact skill bar, then lock it in the position that suits you.
- Resize character and pet buff icons and enable separate item and macro panels to keep your essentials within reach.
Fewer clicks, more play
- Double-click a shadow coupon, tattoo dye or Life Stone to open the relevant action straight from your inventory.
- Auto-enchant and automatic attribute insertion handle repetitive steps when upgrading your equipment.
- Expand the visible inventory grid and enable loot highlighting to find items in your bag and on the ground more easily.
Supplies
Weapons and armor come from hunting, crafting and trading with other players. Supplies are available for adena through Alt+B. Set up automatic restocking in .CFG for longer hunts.
A Mana Potion restores 800 MP and can be used once every 10 seconds — a useful reserve for long hunts and demanding fights.
What you can buy in Alt+B
- Soulshots and Spiritshots, including Blessed Spiritshots.
- HP and MP potions; movement, attack and casting speed potions.
- Elixirs of Life, Mental Strength and CP.
- Escape and Resurrection Scrolls; regular and blessed escape scrolls for castles and clan halls.
- Scrolls of Recovery for death penalties.
- Arrows and bolts; Soul Ore, Spirit Ore, Energy Stones, Summoning Crystals, Battle Symbols and Magic Symbols.
Buffer
The Alt+B buffer offers four ready sets: warrior, tank, mage and healer. The sets use combo buffs in place of the corresponding single buffs. You can save your own set for a character or a pet. Decrease Weight, Magnus and Dance of Shadows are available separately. The combo menu has no duplicate entries with the same effects.
Dance of Inspiration is available as a manual selection: +4 Accuracy. It is not included in the ready sets.
Alt+B buffs last 12 hours, keeping you ready for long hunts and battles.
Buffs cast by characters retain their normal skill duration. Songs and dances last 4 minutes.
Warrior set
- Improved Movement
- Improved Combat
- Greater Might
- Magic Barrier
- Mental Shield
- Improved Condition
- Chant of Blood Awakening
- Improved Critical Attack
- Guidance
- Berserker Spirit
- Clarity
- Holy Weapon
- Resist Shock
- Chant of Victory
- Song of Earth
- Song of Warding
- Song of Wind
- Song of Hunter
- Song of Vitality
- Song of Renewal
- Song of Champion
- Dance of the Warrior
- Dance of Fire
- Dance of Fury
- Dance of Vampire
Tank set
- Improved Movement
- Improved Combat
- Greater Shield
- Magic Barrier
- Mental Shield
- Improved Condition
- Chant of Blood Awakening
- Improved Shield Defense
- Improved Critical Attack
- Guidance
- Clarity
- Regeneration
- Resist Shock
- Chant of Victory
- Song of Earth
- Song of Warding
- Song of Wind
- Song of Hunter
- Song of Vitality
- Song of Renewal
- Song of Champion
- Dance of the Warrior
- Dance of Fire
- Dance of Fury
- Dance of Vampire
Mage set
- Improved Movement
- Shield
- Greater Shield
- Mental Shield
- Improved Condition
- Acumen
- Concentration
- Improved Magic
- Wild Magic
- Berserker Spirit
- Clarity
- Improved Shield Defense
- Resist Shock
- Prophecy of Wind
- Song of Earth
- Song of Warding
- Song of Wind
- Song of Vitality
- Song of Renewal
- Song of Meditation
- Dance of Mystic
- Dance of Concentration
- Siren's Dance
Healer set
- Improved Movement
- Shield
- Greater Shield
- Mental Shield
- Improved Condition
- Acumen
- Concentration
- Improved Magic
- Wild Magic
- Clarity
- Improved Shield Defense
- Regeneration
- Resist Shock
- Prophecy of Wind
- Song of Earth
- Song of Warding
- Song of Wind
- Song of Vitality
- Song of Renewal
- Song of Meditation
- Dance of Mystic
- Dance of Concentration
- Siren's Dance
Agathions with Feline Queen and Seraphim buffs are sold for Adena and automatically apply their buff to the owner. Maintaining the buff also costs Adena.
Your buff shop · .sellbuff
- Turn your support character’s skills into Adena. In a peaceful town or trading zone, enter .sellbuff, choose your learned buffs, set your prices and open the shop.
- Available to Prophet, Warcryer, Overlord, Elven Elder, Shillien Elder, Sword Singer and Blade Dancer, including their third classes. Set prices individually or apply one price to a group of skills.
- Buyers simply click the seller, choose individual buffs or an available set from the shop’s offers, and pay with Adena.
- Purchased buffs last 5 hours. The seller receives the Adena without a commission, and selling uses no MP or consumables.
- Once your shop is open, enter .offline — your character will keep selling buffs while you take a break from the game.
Explore and trade
Plan your next goal without leaving the game. The bestiary helps you find monsters and inspect their drops and spoil; boss information helps you prepare your next raid. The world market lets you search by item name, compare offers and list your own goods.
Clan battles
Every victory builds your clan’s reputation. During boss-zone battles and sieges, an on-screen scoreboard shows clans, their crests and kills. See who is leading and seize the moment to turn the fight.
Clan battles · zones and scoring
- Queen Ant, Core, Orfen, Baium, Antharas, Valakas and Barakiel areas, plus Hallate, Kernon and Golkonda in the Tower of Insolence. The scoreboard also works during castle sieges.
- The scoreboard opens when PvP involving a clan begins. At epic bosses, scoring starts 2 hours before respawn and stays available while the boss is alive. At Barakiel and the Tower of Insolence bosses, it runs only while the boss is alive; at castles, only during the siege.
- Defeating an opponent in the zone gives your clan 1 point. Fights within your clan, alliance, party or command channel do not count, nor do kills between characters on the same computer. Boss damage keeps an existing battle active but awards no points.
- Show or hide the scoreboard in .CFG. This changes your display only; the battle’s shared score keeps running.
When the scoreboard disappears
- After 30 minutes without combat activity, the scoreboard hides. PvP and hits on the boss keep the battle active; standing or moving around in the zone does not.
- If combat resumes before an hour has passed, the old score returns. After 60 minutes of inactivity, the score resets and the next PvP starts a new battle.
- After the boss dies, the final score stays for 15 minutes. After a siege ends, it stays for 40 minutes.
- After leaving the zone, you can follow the battle for up to 40 more minutes. The scoreboard disappears sooner if the inactivity timer or final-score display expires.
.CFG
Type .cfg in chat to tailor everyday play to your needs. Auto-loot, party tools, auto potions and visual effects share one window, so you can choose what works for you.
Hunting and loot
- Toggle automatic pickup of items, adena and herbs separately. Prefer picking up your loot by hand? The choice is yours.
- Control experience gain: keep leveling or pause it to stay at your chosen level.
- In a party of your own characters, you can route loot to the leader. See Loot and party for distribution details.
Party and clan tools
- Set your party to teleport with its leader. Each party leader can separately consent to following the command channel.
- Enable returning your own characters to town together and party Unstuck to avoid moving them one at a time.
- The party leader can pay for the whole party’s agathion support with their own adena.
- Clan leaders can craft using materials from their private or clan warehouse, with fewer trips to move resources into inventory.
Automatic CP, HP and MP potions
- Enable each potion type separately and choose its percentage threshold to suit your class’s HP, MP and CP needs.
- Suitable potions in your inventory are used at the selected threshold. Refill your stock manually or with automatic supply restocking.
Display and notifications
- Control the visibility of traders, group-heal animations, skill effects, costumes, cloaks and agathions — useful in crowded towns and large battles.
- Toggle kill notifications for clan wars and sieges, event announcements and the clan battle statistics window.
- You can also select Elmyrion, Essence or Classic HF styling and check your Premium expiry date here.
Warehouse and mail
Items can go straight into the clan or private warehouse, so there is no need to fly to town. Mail opens while hunting, not only in town.
Crafting, cubes and materials
- The clan leader can enable personal and clan warehouses in .CFG. Crafting and blacksmith orders use materials from the enabled storage.
- The crafting cube raises the success chance of eligible recipes. The insurance cube returns part of the materials spent on a complete failure. Choose the mode in .CFG → Supplies / cubes.
- Buy cubes for Coin of Luck in Alt+B → Services → Runes. Each eligible attempt consumes one cube of the selected type.
Clan warehouse · shared stock
- Plan your clan’s progress together. Contribution records show who supplies the clan warehouse, while stock information helps prepare for crafting and upcoming expeditions. Access follows clan permissions.